Test

Friday, April 20, 2012

I'm Engaged... Now What? 6 Steps to Help You Get on the Right Track

He got down on one knee and asked you to spend the rest of your life with him... Of course you said YES and have been dreaming about this moment since you were young! The day that you have been dreaming about since you were a little girl is going to come true. You start daydreaming of what it will look like and then reality kicks in... WHERE IN THE WORLD DO I START?! No fear... here are 6 steps to help you get everything started on the right track.


1. Start Spreading the News: If you are one who wants to jump on Facebook to share the news immediately or decide keep the moment private a bit longer... Whenever you decide to share the news... Be sure when you start spreading the news that you tell your parents FIRST!! Then other family and friends. You'll make phone calls, of course, but you can also send email, a letter, or use social media. You could even throw a party.


2. Discuss a date: Once the word is out, expect lots of questions, including "When are you getting married?" Reveal a date if you have one, or let curious friends know plans are in the works -- as they should be, especially if you want to hold your wedding at a popular time of year, such as June or over a holiday. Locations, photographers, caterers, and other professionals book up early, sometimes a year in advance.


3. Think About the Big Picture: Envision the type of wedding you both want -- maybe it's the event of childhood dreams or one that reflects your grown-up tastes. Even if you are set on a formal event in a ballroom, considering other possibilities, such as a seaside ceremony or a Sunday brunch, may change your mind or reinforce your choice. The same holds true for selecting the time of day and mood of the wedding.


4. Set a Budget: This is probably one the most crucial things to do before planning a wedding. Be clear and definite about what your budget is. Prior to making any decisions about the style, location, etc., figure out what you have to spend and whether your families will contribute. Make sure you and your fiance are in agreement about your priorities before talking to your parents about budget and logistics.


5. Register for Gifts: Surprising as it may seem, as soon as people find out about your impending nuptials, presents will start flowing in. It's never too early to register, not only to help ensure you get something you like and need, but also to make it easier on friends and family who are pondering what to purchase. Even if you don't select everything right away, at least go to one store and decide on some things for your list. You can always add more later and register at other stores. Try to limit your registry to three places. This way, it'll be easier to manage. And, in case you don't get everything you put down, many stores will keep your registry active for as long as a few years.


6.  Insure Your Ring: You may never want to take off your priceless new treasure, but realistically, you'll have to at times. It's a good idea to talk to an insurance agent about coverage in case the stones or the ring itself ever need to be repaired or replaced.

You will first need an appraisal by a certified independent gemologist; most jewelers will provide this service upon purchase. And make sure you understand all the terms of the policy. Find out whether you are covered if the ring is lost, stolen, or damaged, and what stipulations there are, if any. If the ring is damaged, does the company give you a check so you can have it repaired by the jeweler of your choice, or do you have to use one of their jewelers? You'll also want to know how long the claims process takes.

You might be able to add a jewelry rider to your existing homeowner's or renter's policy; if not, set up a separate policy. And, most important, take very good care of your ring -- when you're wearing it and when you're not -- because that's the best insurance of all.


All pictures and info from www.marthastewartweddings.com

Tuesday, April 17, 2012

Margarita Ice Pops

So if you know me... you know that I LOVE MARGARITAS!! And this post seemed fitting today, as my brother is in town and he ALWAYS has something to say about my tequila stash. Like I always tell him, you have to have an assortment of tequila... bottom shelf to top shelf. Top shelf is for sipping and bottom shelf is for mixing! It always taste the same when its mixed together and when its FREE most people don't care what it is!!


Ok margaritas = tequila... which always makes for a great day! So I saw this recipe on Hostess with the Mostess and knew I HAD to share because warm weather is here, I am pulling out patio furniture and getting ready for some summertime FUN! This recipe gives a unique twist to the frozen margarita and with Cinco de Mayo only 2 weeks away best to start trying out drink concoctions NOW!


The original recipe is form Bon Appetite and couldn't be easier to make. You basically take lime flavored ice pops or fruit bars... they say pour... I say SOAK and soak the pops in a mixture of tequila and lime, then lightly dip 1 edge of the pop into kosher salt.  Or you could just mix up your own margarita... freeze them into pops and then dip into salt. I would go with option #2!


Ingredients:

  • 3/4 cup of sugar
  • 3/4 cup fresh lime juice
  • 1/2 cup water
  • 2 tablespoons fresh lemon juice
  • 2 tablespoons fresh orange juice
  • they say 2 tablespoons of tequila... I say go for what you know ;-)
  • 2 tablespons orange liqueur (recommended: Grand Marnier)
  • Kosher salt, for garnish
  • Small cups (Dixie bathroom cups... you know the ones you use to use to make kool-aid pops)
  • Popsicle sticks
Directions:
  1. Combine sugar, lime juice, water, lemon juice, and orange juice into a small saucepan over medium heat.
  2. Cook, stirring, until sugar dissolves.
  3. Remove from heat and allow to cool.
  4. Once cool, transfer to a blender with tequila, orange liqueur, and lime wedge and process until smooth. 
  5. Pour into cups and cover the top of each cup with foil.
  6. Place the popsicle stick in center of cup (down through foil, which will hold it in place).
  7. Freeze until hard, preferable overnight.
  8. Remove from freezer and run cup under warm water to loosen popsicle.
  9. Garnish with kosher salt and serve.
ENJOY


Friday, April 13, 2012

Bathroom Update

Hi Everyone~


I know that it has been a few days, but I have been tolling away in the bathroom, so that I could have a shower in the house by the weekend! Mission accomplished... YES!!! Finally... I was two days short of going on 3... yes 3 weeks of not having a shower. I will definitely be posting pictures soon, but am soooo tired right now! I had to clean the house today and that was NO small feat. Luckily... I did start cleaning last week, so not as bad as it could of been! Will definitely be posting pics by the end of the week. My biggest dilemma right now is what feel I am going for in the bathroom. I want spa... and have bought 4 showers curtains and still don't know if I have the right one. I am going to IKEA tomorrow, so we will see what I turn up!! I am putting myself on a strict budget, as I have already dug enough in my pocket to get this bathroom done!! So with the bathroom done... I can now get back to posting on a regular basis!  

Wednesday, April 11, 2012

How to Pick the Right and Good Paintbrush

So I getting to the end of my bathroom renovation, so you know what that means PAINTING!!  I saw this post on a blog called Today's Nest and just had to share it because I was literally in Lowe's last night trying to figure out what paintbrushes I needed to complete this project the quickest and most efficiently. Be sure to check out this blog because they have a TON of great posts!!

OK... so you have your paint color or stain and you walk over to the massive amount of paint brushes AND rollers available... do you just look and stare OR do you get caught up in all the great accessories that they have for painting. Corner pads, edge trimmers, paint pads, trim rollers... and the list can go on. Like I said I get caught up.  I have a bag of materials I have to take back today because I got caught up last night.  

But really after you've chosen the right stain or paint, how do you choose the right tools for the job... and does it even matter?  Of course it does!

Anatomy of a brush


Handle – most importantly, choose one that fits well in your hand.  Made of wood or plastic.  Common types are:
  • Beaver tail short handle – 2 inches long.  It is good for maneuvering in tight, narrow places.
  • Beaver tail handle – usually 4 inches long.  It is the standard size for most projects.
  • Sash handle – 6 ½ inches long.  It is good for extra control when painting as it is easier to turn.
Ferrule – this is the metal piece that holds it all together.  It can be made from copper, steel 
or tin.


Bristles – where all the magic happens.  The butt end of the bristles are held together in an epoxy setting inside the ferrule.  The tip end holds and delivers the paint.


Plug – this handy part is nestled within the bristles to divide them and act as a reservoir for the liquid.  It is typically made of wood or cardboard.  Better brushes will have smaller, thinner ones.


Keepers – that plastic sleeve the brush is in.  Hold on to it to store your brush after each use.  It is perfectly sized and fits over the handle, too.

In the Bristles
Flagged (or split) ends on bristles allow them to better hold and spread paint.  The result is more even painting with fewer brush strokes on the painted surface.  A good quality brush will have a high percentage of flagged bristles.


Except those intended for precision painting, higher quality brushes will also have bristles of varying length.


Bristles of good quality brushes are tapered.  Tapering allows the bristles to hold more paint.
Some common types are:

  • Natural hog bristles – best for oil-based paints.  Don’t bother to use these bristles with anything other than oil-based paints.  The naturalness of them makes them prone to holding water which ends badly.
  • Nylon bristles – used for latex paints. 
  • Polyester – can be used for all paints with relative success.


Types of brushes

Wall brush – use this one on walls, floors, and ceilings.  Generally found in 3 to 5 inch versions, pick the one that suits you best. 


Angle sash brush – use this one for more precise painting such as trim, sashes, and sills.  It is perfect for cutting in corners. These most commonly come between 1 to 3 ½  inch varieties. 2 ½ inch seems to be favored by many painters.


Flat sash brush – use this one for wide trim and sashes.  You will find this in a few sizes, but 3 inch is a good starting place. 


More to consider
You don’t necessarily have to buy the most expensive brush, but choose a good quality one that will last for many paint projects to come.


Avoid those brushes with bristles secured by glue.  Look for epoxy settings.


Dipping your brush just halfway up the bristles is sufficient to load it with paint.  If you dip it all the way to the ferrule you can cause damage, and at the very least, a clean-up nightmare.


To release excess paint, gently tap both flat sides of the brush on the inside of the paint can.  


Break the habit of dragging the side along the inside of the can.  This removes much of the paint that you just loaded.


Maintenance and care


Clean brushes immediately to avoid hardening.


Use a metal comb on wet bristles.


Clean oil based paints from brushes with solvent.  Use water and mild detergent to clean latex based paints.


Keep brushes in the plastic sleeve (keepers) in which they were purchased.  If you don’t have that any longer wrap brushes (with bristles flat) in aluminum foil.


Always store flat or suspended by the hole in the handle to keep bristles straight.


Soaking brushes in water can cause irreparable damage to the filament and/or epoxy setting and could cause the ferrule to rust.


Need to take a break?  Keep a supply of plastic wrap around to cover your brushes and keep them from drying out.


And all those other accessories... they definitely help, but the good old paintbrush does the trick every time!!


Sunday, April 8, 2012

How To Die Clear Glasses

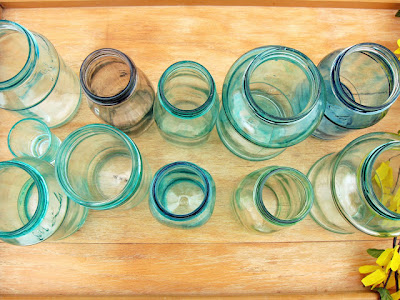
Saw this idea on PINTEREST and knew that I would probably be doing this for the glasses I use in my bathroom, which is currently undergoing renovations!! Go take a look at the blog Craft Berry Bush and this was where I got the idea from.


Now let the FUN begin!


The jars I am using I got from Old Time Pottery in Surfside Beach, SC. If you have an Old Time Pottery go check out the store as they have a TON of items at GREAT times. My jars ranged from $1.49-$3.99.


You will need:
~ Clear Jar
~ Mode Podge or White Elmers' GLue
~ Paint Brush
~ Food Coloring
~ And last but not least PATIENCE


Now let's begin... Mix 1 tsp of glue, 3 drops of food coloring and 1.5 tsp of water.  You might want to try different ratios and see what you prefer though. Obviously the more food colouring the darker the jar will be. In order to make a turquoise shade you will need two drops of blue and 1 drop of green.


In a small bowl, place the glue, food colouring and water. And mix together with a brush.


This amount is sufficient to cover three jars if you are using the brushing method. 

Turn your jar upside down and using even strokes, brush onto the jar from bottom to top, being careful not to go over it too much or the glue will start to clump together. The streaks you see when the mixture is wet will ALMOST be invisible if done correctly. And this is where the patience comes in.

Be sure to seal the jar with a sealant, so that if you do use the jar as a vase all of your hard work will not come off!!

And now you have beautiful jars to display around your home. Me I am going to use mine in the bathroom!! I have ordered a TON of items of off Etsy... bath bombs, body scrubs, bath balls that fizz, bath salts. Yes I am getting a little over the top with having girly things in the bathroom and can't wait to see the products in the jars. 

Be sure to share your pictures with me, so that I can show them on my blog! I would LOVE to see how they come out.


Thursday, April 5, 2012

Easter Inspiration

With Easter this Sunday... thought I would share some inspiration pictures of what you could do for Easter decorations.!! ENJOY & HAVE A GREAT THURSDAY! One more day until the weekend.


The banner can be made by cutting ovals out of cardstock paper and then pasting on pre-formed letters. Have fun with decorating the eggs. And when Easter is over, just store for next year!!

Paper Pom Poms are EVERYWHERE!! Be sure to check out my earlier post on how to make these. They look great everywhere and are quick and inexpensive way to liven up a space. Want to create that backdrop? 1. Get 2 foam boards and tape them together. 2. Get some fabric you like and enough to cover the two boards. 3. Using fabric adhesive... spray onto board and lay fabric on top. 4. Pull fabric until smooth and secure on the back. Quick and easy!! Just be light on that spray adhesive. I learned this the hard way!!

More poms AND see those blue tinted glasses on the way... I will be putting up a post on how to make this lovely creation tomorrow, so be on the lookout!!

Orange and Pink anyone... these colors sure make a statement!! I love this color combination.  See the jars on the left side of the photo... you can get these at the Dollar Store.   Just decorate with some ribbon and there you go!! When creating and organizing make the Dollar Store one of your first stops! They have some of the best DIY and storage solutions!! Just get a can of spray and that's all you need!


Baby's Breath Bunny Wreath = LOVE!!

Buy a case of water and make the labels at home on your home computer. Will be putting up a template for water bottle labels next week!!

Peeps on a stick... Easter wouldn't be Easter without peeps!!


Tuesday, April 3, 2012

Bathroom Renovation - Part 2

My bathroom... where do I start!! I have learned the BIGGEST lesson about hiring contractors in the past few days.... DO YOUR RESEARCH!! The contractor (K-Tell Contracting... owner's name is Donnell) that I began with I ended having to let go, as he was trying to nickel and dime me because I am a young female. And on top of that he was completing work that I did not approve of and then was charging me for it!! Let me say there were a number of things that went wrong with this contractor and it was just a poor experience. I know for a fact that I will NEVER hire this contractor again. But on to brighter news...


That same day I let go of that contractor, I started looking to interview new contractors, as I was in(am still am) in desperate need of a bathroom with a shower. Having to call friends on a daily basis to get a shower is NO FUN!! Now I had to think... how do I find a trustworthy contractor that can get the job done in a timely fashion and for a decent price.  I got smart and decided to use the resources that were available to me the internet and family. A great place to look for contractors is website called Angie's List. It does cost to access this site, but well worth the 8.25!! $3.25 a month and a one time fee of $5 to sign up. I was able to find multiple contractors on this site, reviewed pictures of their work as well, and was able to read reviews from others who have used their services.  I ended up picking a new contractor that same day, but they could not start until Monday... it was Wednesday and I was going home on Friday, so waiting a few days would not make a big difference.


Well when the new contractor (Mr. Sims) saw the work the past contractor had done he just shook his head and said we will get you straight. We ended up tearing down some of the previous contractors work!! But it's all good. At least I know the bathroom will be right. At the moment I am still a ways from having a complete bathroom. I have NO bathroom floor... it got ripped down to the joists!! 


My biggest gripe in this whole things is the amount of dust and dirt that is EVERYWHERE. I just look around and just shake my head. I want to start cleaning, but what's the point it will all just get dirty again. So I take alot of deep breaths and try not to look around me because if I do I will have an anxiety attack... lol!! My bathroom should be done by the end of the week and I am bringing in a cleaning company as soon as this renovation is done... I can't even tackle the level of dust and dirt that is going on in this house right now. 


Hopefully everyone had a great weekend and a FAB Monday!!

Monday, April 2, 2012

More Pics of the Baby Shower

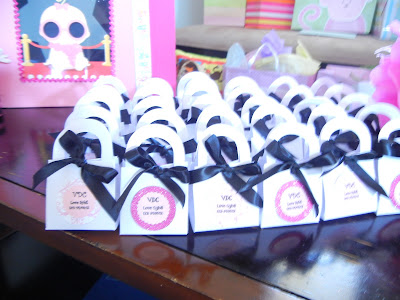
Here are some more pics of the baby shower that a guest sent to me yesterday!! Enjoy!